GM Parts Installation Instructions: A Comprehensive Guide
Welcome! Installing General Motors (GM) parts can significantly enhance your vehicle’s performance‚ safety‚ and overall value. This section provides a foundational understanding of the process‚ emphasizing the importance of following official GM guidelines.
Proper installation ensures compatibility and avoids potential issues. Whether you’re a seasoned mechanic or a DIY enthusiast‚ this guide will navigate you through each step. Remember‚ accurate installation directly impacts your vehicle’s reliability and longevity.
Always prioritize safety and consult official documentation.
II. Safety Precautions Before Installation
Prioritize Safety! Before commencing any GM parts installation‚ disconnect the negative battery cable to prevent electrical shocks and short circuits.
Always wear appropriate personal protective equipment (PPE)‚ including safety glasses‚ gloves‚ and sturdy footwear. Work in a well-ventilated area‚ especially when dealing with fluids or chemicals.
Use jack stands to securely support the vehicle – never rely solely on a jack. Be mindful of hot surfaces and allow components to cool before handling. Follow all safety warnings in the GM installation manuals.
III. Essential Tools for GM Parts Installation
Proper tools are crucial! A comprehensive toolkit is vital for successful GM parts installation. This includes a socket set‚ wrenches (metric and standard)‚ screwdrivers (various types)‚ pliers‚ and a torque wrench for precise tightening.
Power tools like impact wrenches and drills can expedite certain tasks. Diagnostic equipment‚ such as a scan tool‚ is essential for identifying issues and resetting systems.
Having the right tools prevents damage and ensures a professional result.
A. Hand Tools

Fundamental for precision! A robust selection of hand tools forms the foundation of any GM parts installation. This includes metric and standard socket sets‚ combination wrenches‚ adjustable wrenches‚ and a variety of screwdrivers – Phillips‚ flathead‚ and Torx.
Pliers (slip-joint‚ needle-nose‚ locking) are essential for gripping and manipulating components. Don’t forget ratchets‚ extensions‚ and universal joints for accessing tight spaces. Quality hand tools ensure secure and efficient work.
B. Power Tools
Boosting efficiency and speed! While hand tools are crucial‚ power tools significantly streamline GM parts installation. An impact wrench is invaluable for removing stubborn bolts and fasteners. A power drill‚ with various bit sets‚ aids in drilling and screw driving.
Consider a pneumatic or electric ratchet for faster tightening. A grinder can be useful for removing rust or preparing surfaces. Always prioritize safety when operating power tools‚ wearing appropriate protection.
C. Diagnostic Equipment
Essential for modern GM vehicles! Modern GM parts installation often requires diagnostic tools to verify proper function. An OBDII scanner reads trouble codes‚ confirming successful installations and identifying potential issues.
A multimeter tests electrical circuits‚ crucial for electrical component replacements. Battery testers assess battery health before and after installation. Specialized GM diagnostic tools may be needed for advanced systems. Accurate diagnostics ensure optimal performance and prevent future problems.
IV. Understanding GM Parts Diagrams & Catalogs
Decoding GM’s system is key! GM parts catalogs and diagrams are vital for correct installation. These resources detail component locations‚ exploded views‚ and part numbers.
Understanding these diagrams prevents errors and ensures compatibility. Online catalogs offer interactive features‚ while printed versions provide a reliable backup. Familiarize yourself with GM’s numbering system for efficient parts identification. Accurate referencing minimizes delays and guarantees a successful installation process.
V. Locating Official GM Installation Manuals
Accessing the right documentation is crucial! Official GM installation manuals provide step-by-step guidance tailored to specific parts and vehicles.
These manuals are often available through GM’s website‚ subscription services (like SI)‚ or directly from dealerships. Utilizing these resources ensures adherence to factory specifications and proper torque values. Avoid relying solely on generic guides; GM manuals offer precise instructions‚ minimizing risks and maximizing installation quality;
VI. Installing GM Body Panels
Body panel installation demands precision! Begin by carefully removing old panels‚ noting clip locations and wiring harnesses.
New panels require proper alignment – gaps must be consistent for optimal fit. Utilize factory torque specifications when securing panels‚ avoiding over-tightening. Pay close attention to weather stripping and seals to prevent leaks. Thorough inspection post-installation is vital to ensure a secure and aesthetically pleasing result.
A. Door Panels
Door panel replacement requires a delicate touch! Disconnect electrical connectors for power windows‚ locks‚ and speakers before removal. Carefully pry off the existing panel‚ protecting the inner door sheet metal.
Align the new panel‚ ensuring all mounting points match. Secure with appropriate fasteners‚ avoiding excessive force. Test all functions – windows‚ locks‚ speakers – to confirm proper operation. A snug fit prevents rattles and ensures a professional finish.
B. Fender Installation
Proper fender alignment is crucial for a seamless look! Begin by removing any existing damaged fender components and associated hardware. Position the new fender‚ carefully aligning it with the surrounding body panels – hood‚ door‚ and bumper.
Secure the fender using factory-specified fasteners‚ tightening in a crisscross pattern. Double-check alignment and gaps before fully tightening. Ensure all wheel well liners are correctly reinstalled for splash protection and a finished appearance.
C. Hood & Trunk Lid Replacement
Safety first: support the hood or trunk lid properly! Disconnect any wiring harnesses or linkages attached to the original component. Carefully remove the existing hood or trunk lid‚ noting hinge and latch positions.
Position the new panel‚ aligning it with the hinges and latch mechanisms. Securely attach the hinges‚ then connect the latch assembly. Adjust alignment for a flush fit‚ ensuring smooth opening and closing. Verify proper operation before final tightening.
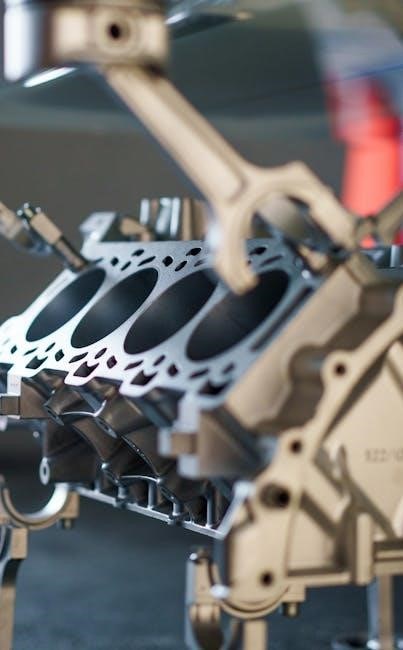
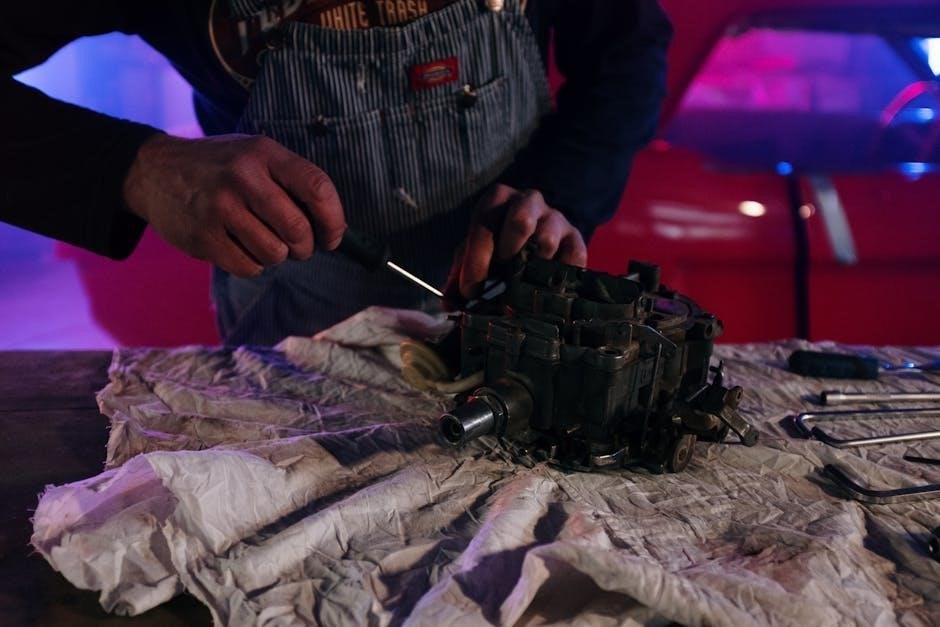
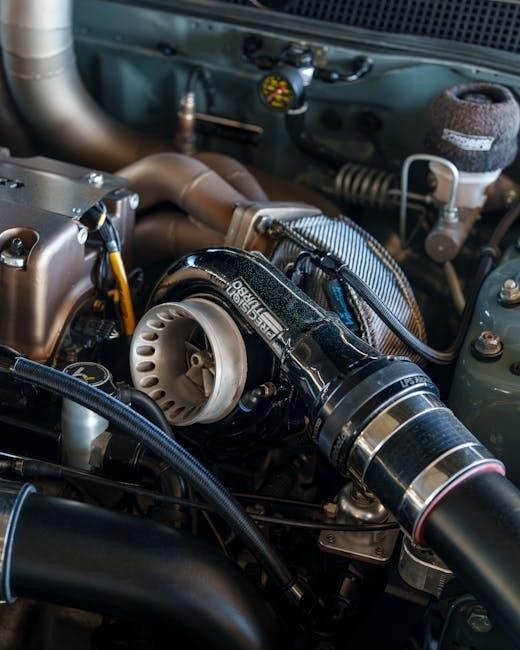
VII. GM Engine Component Installation

Engine work demands precision! Before starting‚ disconnect the negative battery cable. Accessing engine components often requires removing covers or other parts. Always refer to the vehicle’s service manual for specific torque specifications and procedures.
Ensure proper sealing with new gaskets or sealant where applicable. Double-check all connections and hoses after installation. A post-installation check of engine operation is crucial for identifying any issues.
A. Spark Plug Replacement
Proper spark plugs are vital for combustion! Begin by disconnecting the negative battery cable. Locate the spark plugs and carefully remove the ignition coils or wires. Use a spark plug socket to loosen and remove the old plugs.
Gap the new spark plugs to the manufacturer’s specification. Apply anti-seize compound to the threads and install the new plugs‚ tightening to the correct torque. Reconnect everything securely.
B. Air Filter Installation
A clean air filter ensures optimal engine performance! Locate the air filter housing‚ usually a black plastic box. Release the clips or screws securing the housing cover. Remove the old air filter‚ noting its orientation.
Clean the inside of the housing. Install the new air filter‚ ensuring it seats correctly. Reattach the housing cover and secure the clips or screws. Regularly check and replace for peak efficiency.
C. Oil Filter Replacement
Regular oil filter changes are crucial for engine health! Warm up the engine slightly‚ then safely lift the vehicle. Locate the oil filter and place a drain pan underneath. Use an oil filter wrench to loosen and remove the old filter.
Lightly lubricate the gasket of the new filter with fresh oil. Hand-tighten the new filter until the gasket contacts the engine‚ then tighten another ¾ turn. Dispose of the old filter responsibly.
VIII. GM Brake System Parts Installation
Maintaining optimal braking performance is paramount for safety! This section details procedures for brake component replacement. Always work on one side at a time for comparison. Thoroughly clean all brake components before installation.
Proper torque specifications are vital; consult your vehicle’s service manual. Bleed the brake lines after any brake system work to remove air bubbles‚ ensuring firm pedal feel and reliable stopping power.
A. Brake Pad Replacement

Begin by safely lifting the vehicle and removing the wheel. Inspect the brake rotor for wear or damage; replace if necessary. Compress the caliper piston using a suitable tool. Remove the old brake pads and hardware‚ cleaning the caliper bracket thoroughly.
Install new brake pads and hardware‚ ensuring proper alignment. Reinstall the wheel and torque lug nuts to specification. Pump the brakes to seat the pads.
B. Rotor Replacement
Safely lift the vehicle and remove the wheel assembly. Disconnect the brake caliper and carefully remove the old rotor‚ noting any anti-rust clips. Thoroughly clean the hub surface to ensure proper rotor seating. Install the new rotor‚ utilizing new clips if applicable‚ and reattach the caliper.
Torque caliper bolts to specification. Reinstall the wheel‚ and properly torque the lug nuts. Perform a brake system check before driving.
C. Brake Line Installation
Begin by relieving fuel system pressure for safety. Carefully disconnect the old brake line at both ends‚ capturing any fluid with appropriate containers. Form the new brake line to match the original’s path‚ avoiding kinks or bends.
Connect the new line securely‚ using new line fittings and torque specifications. Bleed the entire brake system thoroughly to remove air. Confirm no leaks exist before road testing.
IX. GM Suspension System Parts Installation
Prioritize safety by supporting the vehicle securely with jack stands. Suspension work requires precision; always consult the vehicle’s service manual. Disconnect sway bar links and stabilizer bars before removing struts or shocks.
Carefully compress springs using a spring compressor‚ then install new components. Torque all fasteners to manufacturer specifications. A wheel alignment is crucial after any suspension work.
A. Shock & Strut Replacement
Begin by safely lifting the vehicle and securing it with jack stands. Disconnect brake lines and ABS sensors carefully. Remove the retaining hardware‚ noting the order of components. Use a spring compressor for strut disassembly – safety first!
Install new shocks/struts‚ ensuring proper orientation. Torque all fasteners to specified values. Reconnect sensors and brake lines‚ then bleed the brakes if necessary.
B. Spring Installation
Spring installation demands extreme caution due to stored energy. Always utilize a quality spring compressor to safely contain the spring’s potential. Remove the old spring‚ carefully noting its position and orientation within the strut assembly.
Install the new spring‚ ensuring it seats correctly in the upper and lower spring perches. Slowly release the compressor‚ verifying proper alignment. Double-check all mounting points before proceeding.
C. Control Arm Installation
Proper control arm installation is crucial for maintaining vehicle alignment and handling. Support the vehicle securely with jack stands before beginning. Disconnect the sway bar link and any associated sensors or brake lines.
Remove the old control arm‚ noting the position of bushings and ball joints. Install the new control arm‚ tightening bolts to specified torque settings. Reconnect all components‚ and verify proper operation before lowering the vehicle.
X. GM Electrical System Parts Installation
GM electrical system installations demand precision and safety. Always disconnect the negative battery cable before starting any work. Utilize a multimeter to verify voltage and continuity. When installing components like starters or alternators‚ ensure proper grounding and secure connections.
Carefully follow wiring diagrams‚ and use appropriate connectors. Double-check all connections before reconnecting the battery‚ preventing shorts and ensuring optimal performance.
A. Battery Replacement
Replacing a GM battery requires careful attention to detail. Disconnect the negative terminal first‚ then positive‚ to avoid shorts. Clean corrosion from terminals and cable connectors. Properly position the new battery‚ ensuring secure hold-down clamps.
Reconnect positive first‚ then negative. Verify proper voltage with a multimeter. Reset electronic systems as needed‚ as some GM vehicles require reprogramming after battery disconnection to restore factory settings.
B. Starter Motor Installation
Installing a GM starter motor demands precision. Disconnect the negative battery cable for safety. Locate and remove the existing starter‚ noting wire connections and mounting points.
Install the new starter‚ ensuring proper alignment with the flywheel or flexplate. Securely tighten mounting bolts to specified torque. Reconnect wiring‚ verifying correct polarity. Reconnect the battery and test the starter’s functionality‚ listening for smooth engagement.
C. Alternator Replacement
Replacing a GM alternator requires careful steps. Begin by disconnecting the negative battery terminal. Locate the alternator and disconnect the wiring harness and belt tensioner.
Remove the old alternator‚ noting its mounting bracket. Install the new alternator‚ securing it firmly with the bracket and bolts to the correct torque specification. Reconnect the wiring and belt‚ then reconnect the battery. Verify charging voltage with a multimeter to confirm proper operation.
XI. GM Interior Parts Installation
Interior installations demand precision and care. From seat replacements to dashboard component swaps‚ understanding trim removal is key. Begin by carefully prying off panels‚ avoiding damage to clips.
For seat installation‚ ensure proper bolt torque and electrical connector security. Dashboard work requires disconnecting wiring harnesses and labeling them for reassembly. Carpet installation involves precise cutting and adhesive application for a snug‚ professional fit. Always test functionality post-installation.
A. Seat Installation & Removal
Seat replacement begins with disconnecting the battery. Carefully unbolt existing seats‚ noting wiring harness connections for power functions like heating or lumbar support.
Installation requires aligning the seat tracks with vehicle mounting points and securing bolts to the manufacturer’s torque specifications. Verify proper operation of all electrical features post-installation. Damaged seat tracks necessitate replacement for safe and secure seating. Always double-check bolt tightness after initial use.
B. Dashboard Component Replacement
Dashboard work demands meticulous disconnection of all wiring harnesses‚ labeling each for reassembly. Begin by removing trim pieces‚ then the radio and climate controls.
New components install in reverse order‚ ensuring secure connections. Be cautious of fragile plastic clips. Proper alignment is crucial to avoid rattles. Test all functions – lights‚ gauges‚ HVAC – before fully reassembling. A disconnected battery is essential for safety during electrical work.
C. Carpet Installation
Proper carpet installation requires a clean‚ dry floor‚ free of debris and old adhesive residue. Begin by dry-fitting the carpet‚ trimming as needed around seats and consoles. Apply adhesive evenly‚ following the manufacturer’s instructions.
Use a roller to ensure full contact‚ eliminating bubbles and wrinkles. Reinstall seats carefully‚ avoiding damage to the new carpet. Pay attention to securing edges under trim panels for a professional finish.
XII. Torque Specifications for GM Parts
Accurate torque is crucial for GM parts reliability. Always consult the official GM service manual for specific torque values for each fastener; Using a calibrated torque wrench is essential to avoid over- or under-tightening.
Incorrect torque can lead to component failure‚ leaks‚ or safety hazards. Different bolt sizes and materials require varying torque settings. Document all torque values applied during installation for future reference and maintenance procedures.
XIII. Common Mistakes to Avoid During Installation
Preventing errors ensures a successful GM parts installation. Rushing the process‚ skipping steps‚ or failing to properly identify parts are frequent mistakes.
Ignoring torque specifications‚ using incorrect tools‚ and neglecting safety precautions can cause damage or injury. Always double-check connections and ensure all fasteners are secure. Thoroughly review instructions before starting‚ and don’t hesitate to seek assistance if needed.

XIV. Post-Installation Checks & Adjustments
Verification is key after installing GM parts. Begin with a visual inspection‚ confirming all connections are secure and no tools or debris remain.
Test the functionality of the installed component‚ checking for proper operation. Adjust settings as needed‚ referencing the official GM manual for specifications. A test drive is crucial to identify any unusual noises or performance issues‚ ensuring a safe and reliable repair.
XV. Troubleshooting Installation Issues
Encountering problems during GM parts installation is common. First‚ re-examine the installation manual‚ verifying each step was followed correctly.
Double-check part compatibility and ensure correct orientation. If issues persist‚ consult online GM forums for similar experiences and solutions. Don’t force components; identify the obstruction. If unable to resolve‚ seek assistance from a qualified mechanic or GM dealership for expert diagnosis and repair.
XVI. GM Parts Warranty Information
GM parts typically come with a warranty‚ protecting against defects in material or workmanship. Warranty duration varies by part type – often 12 months or 12‚000 miles‚ whichever comes first.
Proper installation is crucial for warranty validity; retain installation records. Modifications or misuse may void the warranty. Review the specific warranty details accompanying your GM part for complete coverage information and claim procedures. Contact your GM dealer for assistance with warranty claims.

XVII. Resources for GM Parts Installation Support
Numerous resources aid GM parts installation. Official GM documentation‚ including installation manuals‚ is paramount.
GM’s website offers technical assistance and parts diagrams. Online forums and communities provide peer-to-peer support and troubleshooting advice. Consider subscribing to automotive repair databases for detailed instructions. Your local GM dealership’s service department can offer professional guidance and installation services. Utilize these resources to ensure a successful and safe installation process.
XVIII. Using Online Forums & Communities
Online forums are invaluable for GM parts installation. These platforms connect enthusiasts and professionals‚ offering a wealth of knowledge and shared experiences.
Search for specific part installations or vehicle models to find relevant threads. Ask questions‚ share your progress‚ and learn from others’ mistakes. Remember to verify information and prioritize safety. Active communities often provide detailed guides‚ photos‚ and videos‚ supplementing official documentation and fostering collaborative problem-solving.
XIX. GM Dealership Installation Services
GM dealerships offer professional parts installation services. Certified technicians ensure correct installation‚ maintaining your vehicle’s warranty and safety standards.
Dealerships utilize specialized tools and diagnostic equipment for precise work. While typically more expensive than DIY or independent shops‚ it provides peace of mind. Obtain a detailed quote beforehand‚ outlining parts and labor costs. Dealerships can also handle complex installations or those requiring specialized programming‚ guaranteeing compatibility and optimal performance.
XX. Understanding GM Recalls & Technical Service Bulletins
GM frequently issues recalls and Technical Service Bulletins (TSBs). Recalls address safety-related defects‚ offering free repairs at dealerships. TSBs detail known issues and recommended fixes‚ potentially impacting parts installation.
Before installing any GM part‚ check the National Highway Traffic Safety Administration (NHTSA) website for applicable recalls. Reviewing relevant TSBs can prevent installation errors and ensure proper functionality. Ignoring these notices could lead to recurring problems or safety hazards‚ so stay informed!
XXI. Proper Disposal of Old GM Parts
Responsible disposal of old GM parts is crucial for environmental protection. Many components contain hazardous materials like oil‚ coolant‚ and brake fluids requiring specific handling.
Never discard these items in regular trash. Auto parts stores often accept used oil‚ batteries‚ and fluids for recycling. Check local regulations for proper disposal of other components. Some scrap metal yards will also accept old parts. Prioritize eco-friendly practices during and after GM parts installation!
XXII. Maintaining Installed GM Parts
Regular maintenance extends the life of newly installed GM parts and ensures optimal vehicle performance. Follow the manufacturer’s recommended service intervals for fluids‚ filters‚ and adjustments.
Inspect parts periodically for wear‚ damage‚ or leaks; Address issues promptly to prevent further complications. Proper care‚ like cleaning and lubrication‚ can significantly improve longevity. Consistent maintenance safeguards your investment and maintains vehicle safety and reliability after GM parts installation.
XXIII. GM Parts Compatibility Checks
Ensuring compatibility is crucial before installing any GM part. Verify the part number matches your vehicle’s specifications using official GM catalogs or online databases.
Consider the model year‚ engine type‚ and trim level for accurate matching. Incorrect parts can cause malfunctions or damage. Cross-referencing with VIN decoders provides added assurance. Prioritize compatibility checks to avoid installation issues and maintain vehicle integrity following GM parts installation guidelines.
XXIV. Advanced GM Parts Installation Techniques
For experienced technicians‚ advanced techniques optimize GM part installations. Utilizing specialized tools like torque angle meters and digital multimeters enhances precision.
Employing thread-locking compounds and anti-seize lubricants prevents future failures. Mastering diagnostic scan tools aids in post-installation calibrations. Understanding CAN bus systems is vital for electrical component integration. These refined methods ensure optimal performance and longevity following GM parts installation procedures.
Comments