HeadRush Prime Manual: A Comprehensive Guide
Welcome! This detailed manual provides essential guidance for registering‚ connecting‚ and effectively utilizing your HeadRush Prime multi-effects processor‚ ensuring optimal performance․
The HeadRush Prime represents a significant leap forward in multi-effects processing‚ designed for guitarists‚ bassists‚ and vocalists seeking unparalleled sonic flexibility and intuitive control․ This powerful unit combines the capabilities of a traditional pedalboard with the convenience of a modern digital workstation․

Featuring a large‚ high-resolution display and a streamlined user interface‚ the Prime allows for quick and easy tone creation‚ both on stage and in the studio․ It’s built to be simple‚ fast‚ and intuitive‚ enabling musicians to jump right in and craft amazing sounds in seconds․ The Prime isn’t just about replicating classic tones; it’s about inspiring creativity and pushing the boundaries of sonic exploration․
This manual will guide you through every aspect of the HeadRush Prime‚ from initial setup and registration to advanced techniques and troubleshooting‚ ensuring you unlock its full potential․
Unboxing and Initial Inspection
Carefully unpack your HeadRush Prime and verify that all components are present․ The package should include the HeadRush Prime unit itself‚ a power adapter‚ and this user manual․ Inspect the unit for any visible signs of damage incurred during shipping․ If any damage is detected‚ immediately contact the retailer or HeadRush support for assistance․
Before powering on the device‚ visually inspect all connection ports – including the amplifier output‚ PA system outputs‚ and studio monitor connections – to ensure they are free from debris․ Confirm the power adapter is the correct voltage for your region․ Retain the original packaging for potential future transport or warranty claims․ A thorough initial inspection safeguards your investment and ensures a smooth start․
Registering Your HeadRush Prime & Software Claim
To unlock the full potential of your HeadRush Prime‚ immediate registration is crucial․ Visit the official HeadRush website and locate the registration page․ You’ll need your unit’s serial number‚ found on the bottom of the device‚ to complete the process․ Registration grants access to valuable software downloads‚ including additional amp and effect models‚ and crucial firmware updates․
During registration‚ you’ll also claim any included software bundles; Ensure you follow the provided instructions carefully to redeem these offerings․ A valid email address is required for registration and software delivery․ Keep your registration confirmation email as proof of ownership․ Registering your HeadRush Prime ensures you receive ongoing support and access to the latest enhancements․
Firmware Updates: Ensuring Optimal Performance
Maintaining up-to-date firmware is vital for your HeadRush Prime’s stability and functionality․ HeadRush regularly releases firmware updates that address bugs‚ improve performance‚ and introduce new features․ To check for updates‚ connect your Prime to a computer with an active internet connection via USB․
Use the HeadRush Prime software to scan for available updates․ Download and install any identified updates‚ carefully following the on-screen instructions․ Do not interrupt the update process‚ as this could damage your unit․ Firmware updates often enhance existing models and improve compatibility․ Regularly checking for updates ensures you experience the best possible performance from your HeadRush Prime․
Setup and Connections
Proper setup is crucial for optimal HeadRush Prime performance․ Begin by connecting the power adapter to the unit and a suitable power outlet․ For audio output‚ you have several options․ Connect to an amplifier using the ¼” output jacks for traditional guitar amplification․ Alternatively‚ connect to a PA system for live sound reinforcement‚ utilizing the balanced XLR outputs for a cleaner signal․
If recording or using studio monitors‚ connect the ¼” outputs or XLR outputs directly to your audio interface․ Ensure correct impedance matching for best results․ Always power on your amplifier or PA system before powering on the HeadRush Prime to prevent potential pops or noise․
5․1 Connecting to an Amplifier
To connect your HeadRush Prime to a standard guitar amplifier‚ use a standard ¼” instrument cable․ Plug one end into either the left or right ¼” output jack on the rear panel of the Prime․ Connect the other end to the input jack of your amplifier․ For stereo operation‚ utilize both left and right outputs‚ connecting each to a separate amplifier input․
Remember to power on your amplifier before powering on the HeadRush Prime to avoid unwanted noises․ Adjust the output level on the Prime to match your amplifier’s input sensitivity․ Start with a low volume and gradually increase it to achieve the desired sound․
5․2 Connecting to a PA System
For live performance and direct recording‚ connecting your HeadRush Prime to a PA system is straightforward․ Utilize balanced XLR or ¼” TRS outputs on the rear panel for optimal signal quality and noise reduction․ Connect the left and right outputs of the Prime to corresponding inputs on your PA mixer․
Ensure your PA system is grounded correctly to prevent hum or buzz․ Adjust the output levels on the Prime to match the input sensitivity of your PA mixer‚ starting with lower settings and gradually increasing․ Remember to engage any necessary phantom power settings on the mixer if required by your PA system․

5․3 Connecting to Studio Monitors
To connect your HeadRush Prime to studio monitors for critical listening and recording‚ use balanced ¼” TRS or XLR cables․ Connect the left and right outputs of the Prime to the corresponding inputs on your studio monitors․ Ensure your monitors are powered on before adjusting levels to prevent potential damage․
Start with the Prime’s output level set low and gradually increase it while monitoring the signal on your studio monitors․ Pay attention to clipping or distortion‚ and adjust accordingly․ Proper gain staging is crucial for a clean and accurate sound․ Consider using a dedicated audio interface between the Prime and monitors for enhanced control and conversion․

Understanding the HeadRush Prime Interface
The HeadRush Prime boasts an intuitive interface designed for seamless navigation and control․ The large‚ vibrant display serves as the central hub‚ providing clear visual feedback of your rig’s components and settings․ Surrounding the display are dedicated control knobs‚ footswitches‚ and an expression pedal input‚ enabling hands-free operation and real-time adjustments․

The top panel features controls for global parameters‚ preset selection‚ and effects manipulation․ Understanding the function of each knob and footswitch is key to unlocking the Prime’s full potential․ The display’s touchscreen interface allows for deep editing and customization of individual blocks within your rigs‚ offering precise control over your tone․
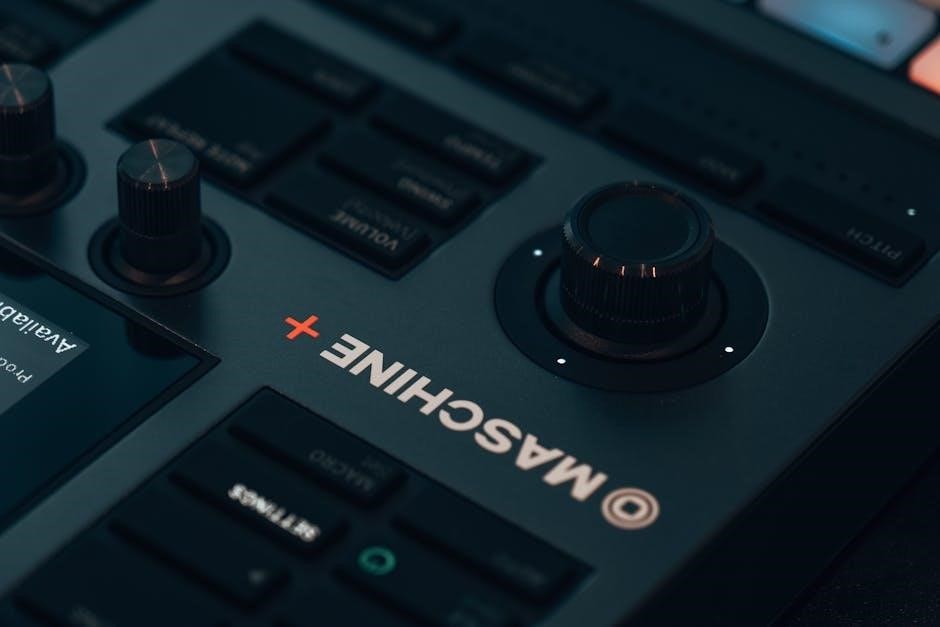
6․1 Top Panel Features & Controls
The HeadRush Prime’s top panel is meticulously designed for intuitive control․ Dedicated knobs manage global volume‚ tuner access‚ and Looper functions․ Footswitches enable preset navigation (up/down)‚ Looper control (record/play/stop)‚ and access to the Stomp Mode for individual effect activation․ The large central display is a touchscreen‚ facilitating deep editing of parameters․
The expression pedal input allows for dynamic control over various parameters‚ adding wah‚ volume swells‚ or modulation effects․ A USB port facilitates firmware updates and connectivity to a computer․ Understanding each control’s function is crucial for quickly shaping your sound and maximizing the Prime’s capabilities during live performance or studio recording․
6․2 Display Navigation & Settings
The HeadRush Prime’s touchscreen display is central to navigating its extensive features․ Swipe left or right to access different rig sections – Amp‚ Cab‚ FX‚ and Global settings․ Tap on individual blocks within a rig to adjust parameters using the on-screen knobs and sliders․ The settings menu‚ accessed via the gear icon‚ allows customization of system preferences‚ including display brightness‚ footswitch assignments‚ and MIDI settings․
Utilize the ‘Undo/Redo’ functions for non-destructive editing․ The display provides clear visual feedback during live performance‚ especially when utilizing the expression pedal in Hands-Free Mode․ Familiarizing yourself with the display’s layout and navigation is key to unlocking the full potential of the Prime․
Core Concepts: Rigs and Blocks
Understanding Rigs and Blocks is fundamental to operating the HeadRush Prime․ A Rig represents a complete preset – a combination of assigned models‚ encompassing amps‚ cabinets‚ impulse responses (IRs)‚ clones‚ and effects‚ alongside their individual parameter settings․ Think of a Rig as your finished sound‚ ready for performance or recording․
Blocks are the individual components within a Rig․ These include amp models‚ overdrive pedals‚ modulation effects‚ delays‚ reverbs‚ and more․ You arrange and connect these Blocks in a signal chain to sculpt your desired tone․ The Prime allows for extensive customization of each Block‚ offering deep control over your sound․ Mastering this concept unlocks the Prime’s creative potential․
Creating Your First Rig
Let’s build your initial HeadRush Prime Rig! Begin by selecting a base amp model – perhaps a clean Fender-style tone․ Add an overdrive Block afterward‚ experimenting with different drive pedals to introduce gain and character․ Next‚ incorporate a modulation effect like chorus or flanger for added texture․ Don’t forget a delay and reverb to create space and depth․
Utilize the intuitive drag-and-drop interface to arrange these Blocks in your desired signal chain․ Adjust the parameters of each Block – gain‚ tone‚ level – to fine-tune your sound․ Save your creation with a descriptive name․ Remember‚ the Prime is designed for quick and intuitive tone creation‚ so experiment freely!
Exploring Amp and Effect Models
The HeadRush Prime boasts a vast library of meticulously modeled amplifiers and effects․ Dive into the amp section‚ exploring iconic tones from Fender‚ Marshall‚ Vox‚ and more․ Experiment with different cabinet simulations and impulse responses to shape your amp’s character․ The effects selection is equally impressive‚ featuring everything from classic overdrives and distortions to lush reverbs and creative modulation․
Don’t hesitate to audition each model – the Prime makes it easy to switch between sounds instantly․ Utilize the search function to quickly locate specific amps or effects; Remember‚ combining different models is where the real magic happens; blend a vintage amp with a modern effect for unique tones!
Utilizing Impulse Responses (IRs)
Impulse Responses (IRs) are crucial for achieving realistic cabinet and speaker simulations․ The HeadRush Prime allows you to load custom IRs‚ expanding your tonal palette significantly․ IRs capture the sonic characteristics of specific cabinets and microphones‚ providing unparalleled realism․ You can import IRs via USB‚ accessing a wide range of third-party options online․
Experiment with different IRs to find the perfect match for your amp models and playing style․ The Prime supports various IR formats․ Remember to manage your IR library efficiently‚ as large collections can consume storage space․ Properly utilized IRs elevate your tones‚ delivering professional-quality sound․
Hands-Free Mode & Expression Pedal Control
Hands-Free Mode on the HeadRush Prime unlocks dynamic performance capabilities․ This feature allows real-time parameter control during live performances without needing to manually adjust knobs․ Assign parameters to the expression pedal for wah‚ volume swells‚ or modulation depth․ The large display provides clear visual feedback while tweaking tones on the fly․

Customize expression pedal assignments to suit your individual playing style and rig configurations․ Explore creative possibilities by mapping multiple parameters to the pedal․ Hands-Free Mode enhances stage presence and allows for expressive‚ nuanced performances․ Mastering this feature is key to maximizing the Prime’s potential․
Global Settings and System Configuration
Global Settings within the HeadRush Prime allow for comprehensive system customization․ Configure input/output settings‚ display brightness‚ and MIDI parameters to optimize the unit for your specific setup․ Adjust buffer size to minimize latency and ensure seamless performance with your amplifier or PA system․ Explore options for firmware updates and backing up your valuable rig creations․
System configuration includes setting the date and time‚ managing storage‚ and defining network connectivity․ Fine-tune global EQ settings to shape the overall tonal character of your rigs․ Properly configuring these settings ensures a stable‚ responsive‚ and personalized user experience․ Regular review of global settings is recommended for optimal performance․
Troubleshooting Common Issues
Experiencing issues? This section addresses frequent problems with the HeadRush Prime․ If the unit fails to power on‚ verify the power supply and cable connections․ For audio dropouts or latency‚ adjust the buffer size in Global Settings․ If MIDI control isn’t functioning‚ check MIDI cable connections and settings within your DAW or external controller․
Should the display freeze‚ attempt a soft reset by holding the power button․ If problems persist‚ a factory reset (caution: data loss!) may be necessary․ Ensure firmware is up-to-date‚ as updates often resolve known bugs․ Consult the HeadRush support website for detailed FAQs and troubleshooting guides․ Remember to document any error messages for efficient support requests․
Specifications and Technical Details
The HeadRush Prime boasts a robust build with a high-resolution 7-inch touchscreen display․ It features 1/4″ instrument inputs and outputs‚ MIDI in/out‚ and USB connectivity for firmware updates and DAW integration․ The processor delivers 24-bit/96kHz audio quality‚ supporting a wide range of impulse responses (IRs)․
Internal memory provides ample storage for rigs and IRs․ Power requirements are 12V DC‚ 3A․ Dimensions are approximately 12․2″ x 6․7″ x 2․8″‚ with a weight of around 7․7 lbs․ The unit supports various effects and amp models‚ offering extensive tonal shaping capabilities․ Detailed specifications‚ including frequency response and dynamic range‚ are available on the official HeadRush website․
Resources and Further Support
For comprehensive assistance with your HeadRush Prime‚ the official HeadRush website ([https://headrushfx․com/](https://headrushfx․com/)) provides a wealth of resources․ This includes frequently asked questions (FAQs)‚ detailed knowledge base articles‚ and downloadable firmware updates․ You can also access the HeadRush community forum to connect with other users‚ share rigs‚ and seek advice․
Dedicated support is available via email and phone‚ offering personalized assistance with troubleshooting and technical issues․ Explore online tutorials and video demonstrations to unlock the full potential of your Prime․ Remember to register your product to claim included software and stay informed about new features and updates․
Comments